

I've tried everything; papercraft terrain, battlemats, printed tiles, D&D dungeon tiles, and on and on and on. I've used 28mm scale minis, cardboard stand-ups, and flat tokens. With the exception of 3D printed terrain, I've literally tried everything, and while I like some of the more elaborate costructions, such as papercraft terrain, I always fall back on battlemats and tokens.
 I like the battlemat option because it's re-usable, of course, but it conveys the bare minimum amount of tactical information to a player without supplanting imagination. Tokens, too, are really inexpensive and useful in this regard. 4th edition D&D threw a lot of cardboard tokens at consumers, and while they were okay, the trade dress on every punch-out disc made the artwork muddy up.
I wanted to use this system for my current game, Eldritch Piracy, but I didn't want to spend a ton of cash. However, I was going to need special tokens for certain monsters and it was only natural that I made my own. Here's what they look like (click pics to enlarge).
Pretty nifty, eh? Now, I can't take credit for the idea, but I can't exactly give credit, either. There's versions of this idea floating around online and on The YouTube. However, I don't think anyone has put this version of these tokens online. In any case, here's the set up.

My work space. Note that these materials are for 1" tokens, which means they are perfect for starter games and games where you want a lot of adversaries to throw at players. These things are very inexpensive, and dead simple to make.

These are clear epoxy Bezels (or Cabochons), used in jewelry making. They are clear with adhesive on the back side. Cool.

These are 1" foam rubber (non-stick) furniture pads. You will have to look around for these. Scotch makes them in a tan color. The secret is to look for rubber or foam rubber. Most pads you will find are felt. This will not work. Okay, it will work, but not as well. These are self-adhesive, too. Peel and stick. Just like the movie stars.

This is an optional product. You'll only need it if you get glass cabochons because those are not self-adhesive and this stuff is specially formulated to work with glass cabochons and dry crystal clear. I'll explain later.

This is the most expensive piece of hardware you'll need. I got mine for nine bucks. It's a circular hole punch that makes 1" circles. I think you can see where this is going.

Start with your artwork. I made a color copy of one of my sheets of Pathfinder Pawns, but you can use anything that will stamp out into a 1" circle. If your computer skills are mighty, you can resize player artwork to make personalized character tokens. I have not tried this with Magic: the Gathering cards (they may be too big) but I am willing to bet they would work, too.
Basically, anything you want to make a token out of. Cut into strips slightly wider than 1". This is on cardstock, for durability and also for slightly better color reproduction.
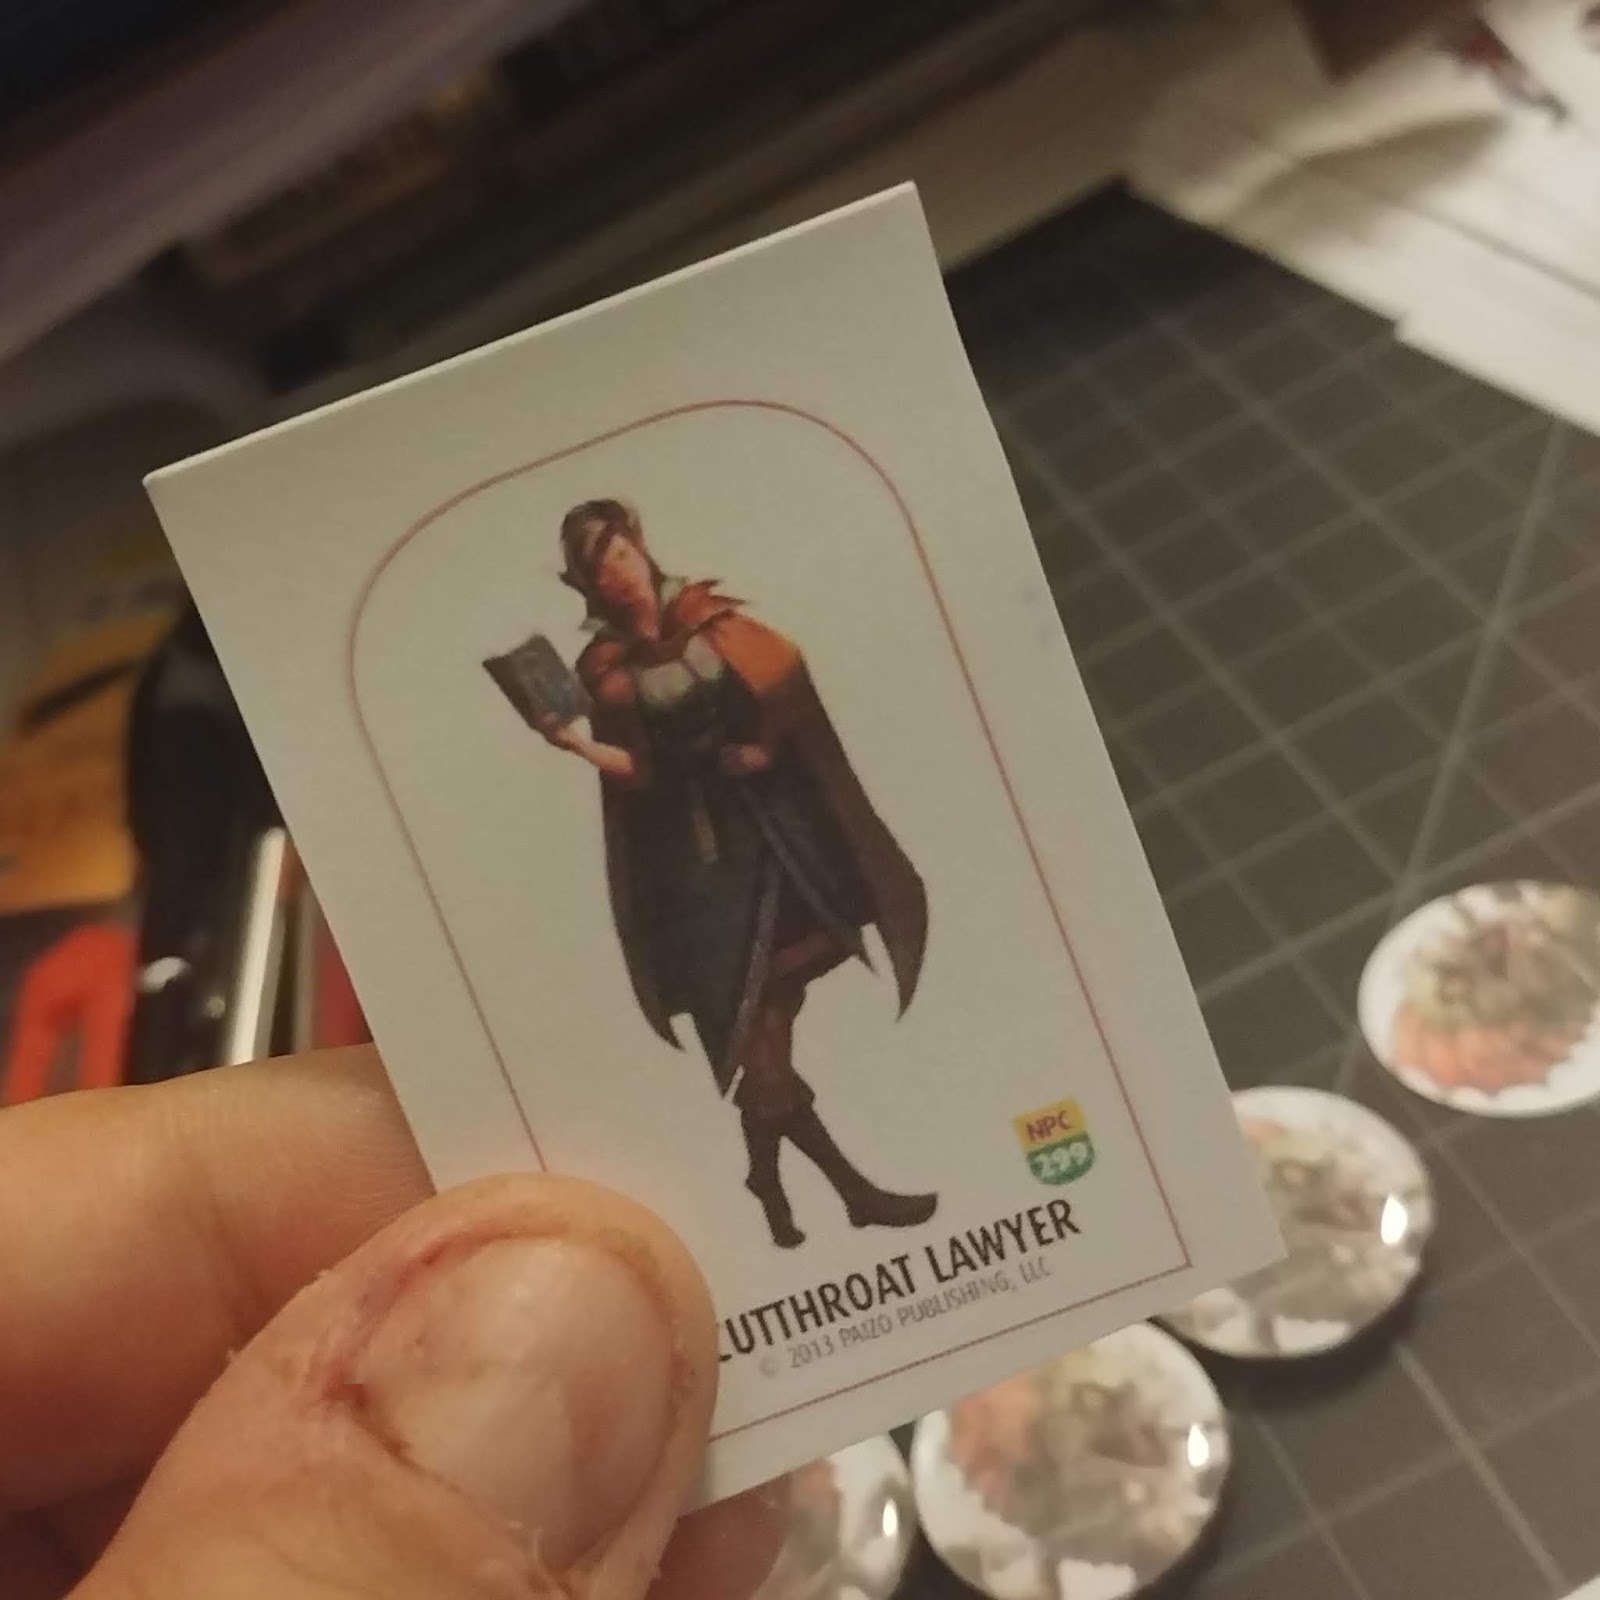
I have non-player characters that will be around for the whole campaign, so they get a token, for when they are taken hostage or infected with eldritch ennui. This is not a lawyer (Jedi hand wave) this is an eager young scholar.

Use the trapping window under your hole punch to eyeball the token. What you see is what you will get, so make sure you have all that you want in the circle.
Now, punch that sucker out. Viola. Step one.

Next, peel off one of the furniture pads. The back side is surprisingly sticky so handle it by the edges.

Now, affix the circle, artwork up, to the bottom of the furniture pad. You only have one crack at this, so what I would do is cradle the base in your fingers, and use your finger tips to align the cardstock circle. Once it's directly over the pad, you can lower it carefully into place. You may mess up once or twice. No biggie. You'll get the hang of it quickly.

Now peel off one of the epoxy bezels, again, handling it by the edges because there's sticky stuff on the back.

Now repeat the above step, holding the pad and artwork in your fingers and using your finger tips to position the bezel and lower it down slowly. Your fingers act as guides so that you can't stick the bezel half-on, half-off. There is a very fine tolerance, and you may feel a slight overlap, but if you can live with it, it's not a problem.

This is what it looks like. Lightweight, durable, easy to store and carry, easy to see on the table, and not apt to slide around, thanks to the textured underside.

If you want something a little nicer, a little more permanent, and a little more high-end, you can get the glass bezels and do the same construction. I think you can see even in this crappy photo that the glass bezel is taller, more rounded, and has a slight magnifying effect that I think looks really cool.

Line your monster up and make a 1" token.

This is where the Mod Podge Dimensional Magic comes in. Spread a thin coat evenly on the back of the bezel.

Attach your artwork, face down, so that it can be seen through the bezel. You have a couple of seconds to position the circle, or use the finger-guide thingy I just taught you.

It takes a few minutes to dry, but when it does, wow! The glass really amplifies the artwork and it's just awesome.

As before, take the furniture pad and stick it to the back of the bezel and cardstock. The textured side is on the outside of the sandwich; the adhesive will stick to the cardstock and be quite durable.
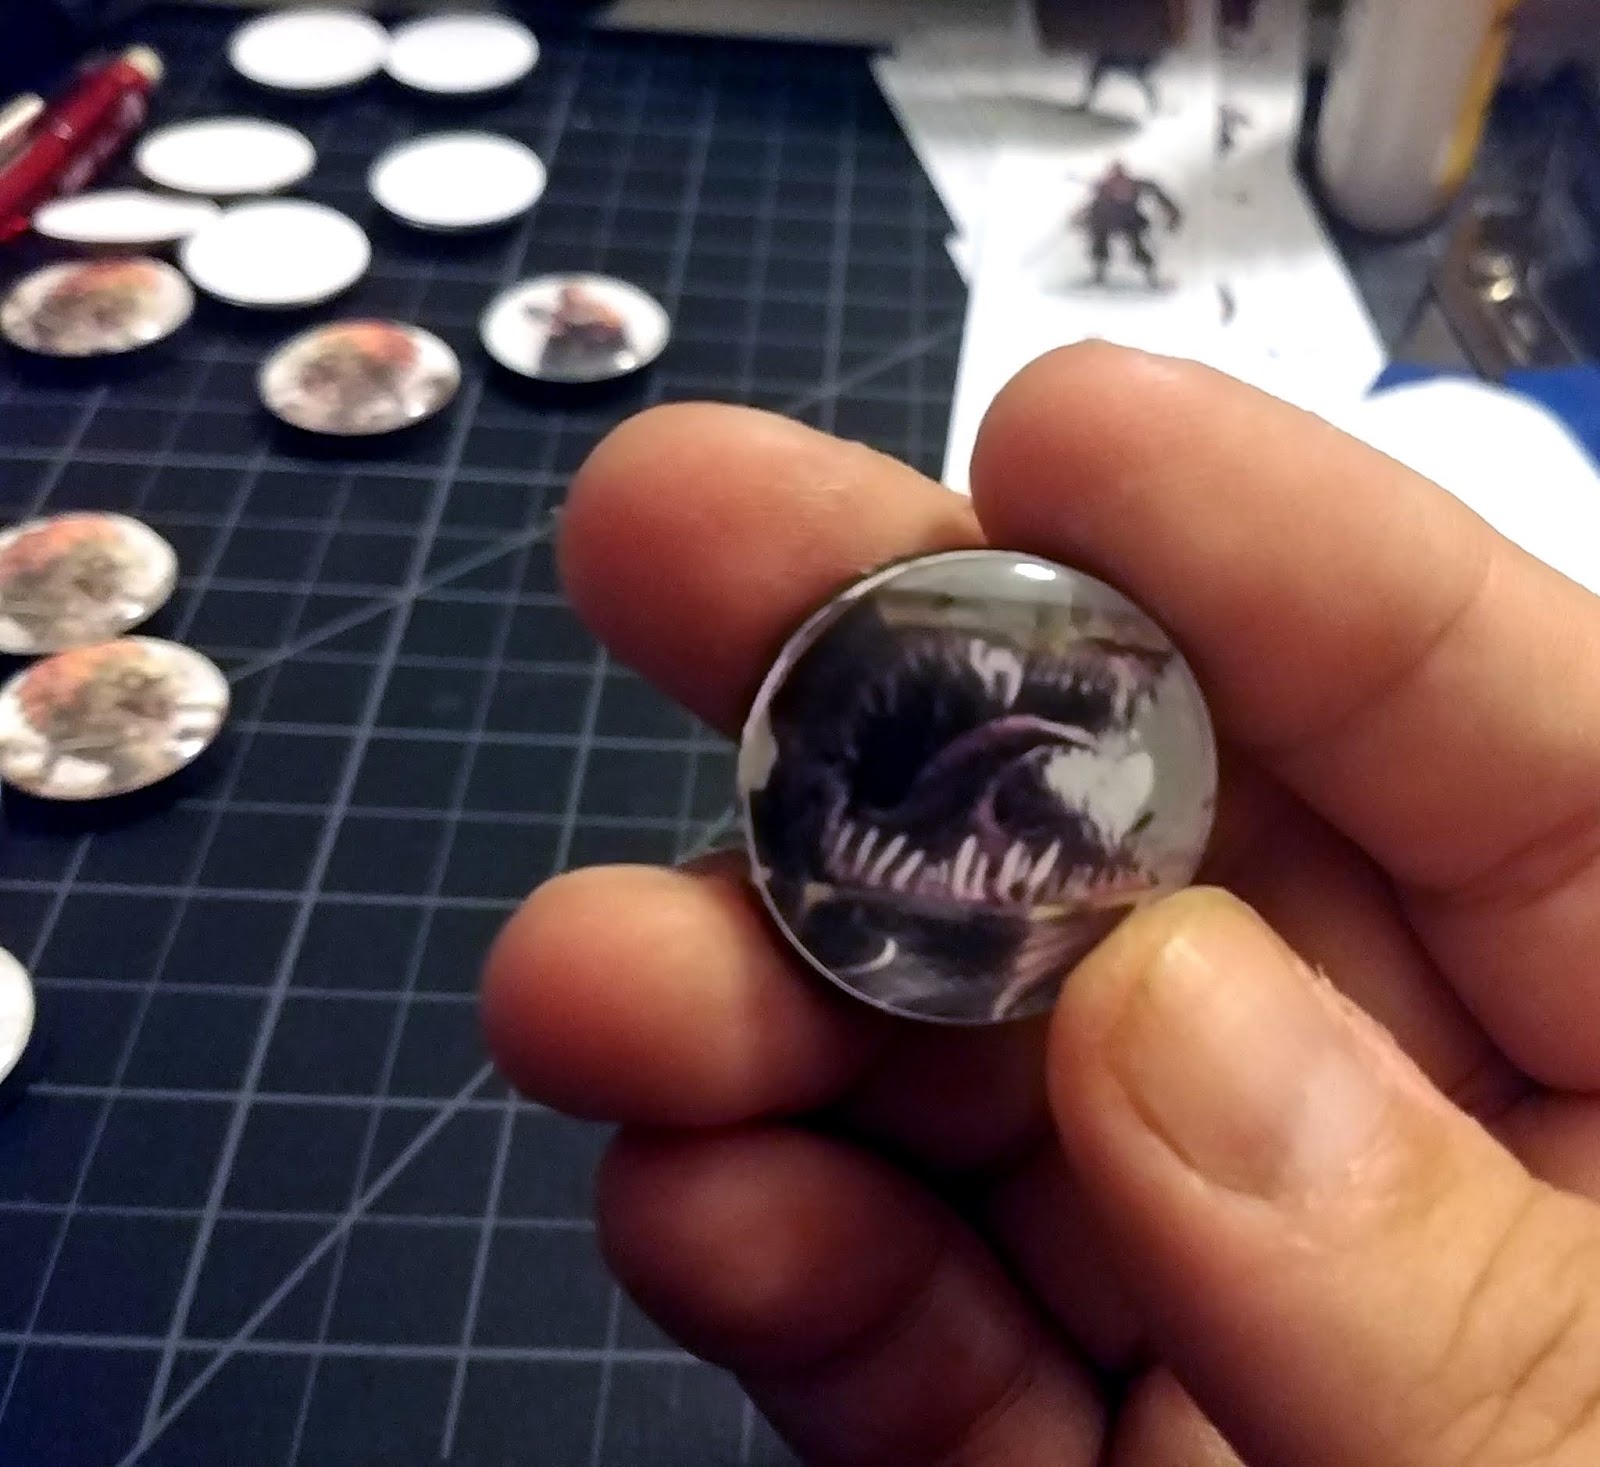
And there's the finished token.
These tokens are really economical to make, mere pennies a piece. I use the glass bezels for my players so they sit up a little higher than the monsters. It should be noted that you can, if you want to, make the same things in 1.5", 2", and 3" tokens; they have those sizes in all of the above supplies. Fair warning, though: the bigger the token, the more expensive it gets. The hole punchers quickly become twenty dollar items. The plastic epoxy bezels aren't as round nor as sticky. And the furniture pads? What a headache. So, you may want to investigate alternatives to this set-up for the larger creatures.
But for skeleton armies? Hordes of orcs? Goblins by the gross? A brace of the city guard? You can't go wrong with these.


No comments:
Post a Comment
Note: Only a member of this blog may post a comment.